Hi Bakers!
I am excited to dive into cake decorating with you all. Cake decorating is where I started my career in food over 15 years ago. Just after college, I took a job at a local bakery where I assembled and frosted layer cakes. While I’ve expanded my baking and pastry skills over the years, simple celebration cakes will always have a huge place in my heart.
Today, I want to introduce you to piping buttercream. There are so many intricate and elaborate cake designs you can make with a piping bag and an array of piping tips, but sometimes simple designs can be just as beautiful. Just look at what we can make using only a few basic cake decorating tools!
Want to learn more about cake decorating? I have several tutorials coming up over the next couple of months. Be sure to subscribe so you don’t miss a thing!
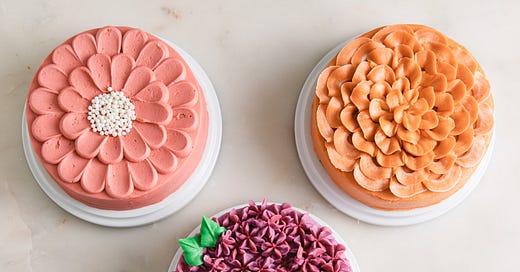
These three buttercream flower cakes use simple techniques that generate “wow” worthy results. You can use your favorite buttercream recipe (American, meringue-based, and even cream cheese frosting should work) on nearly any size of cake. Imagine a larger version as the centerpiece for your next holiday celebration (perfect for Easter or Mother’s Day) or all three mini cakes to decorate a dessert table.
My goal is always to take away any intimidation you may feel and get you in the kitchen to try something new. Your cake will still taste great no matter what, but cake decorating can be so much fun! I hope you’ll give one (or all) of these designs a shot this season.
Hydrangea Cake
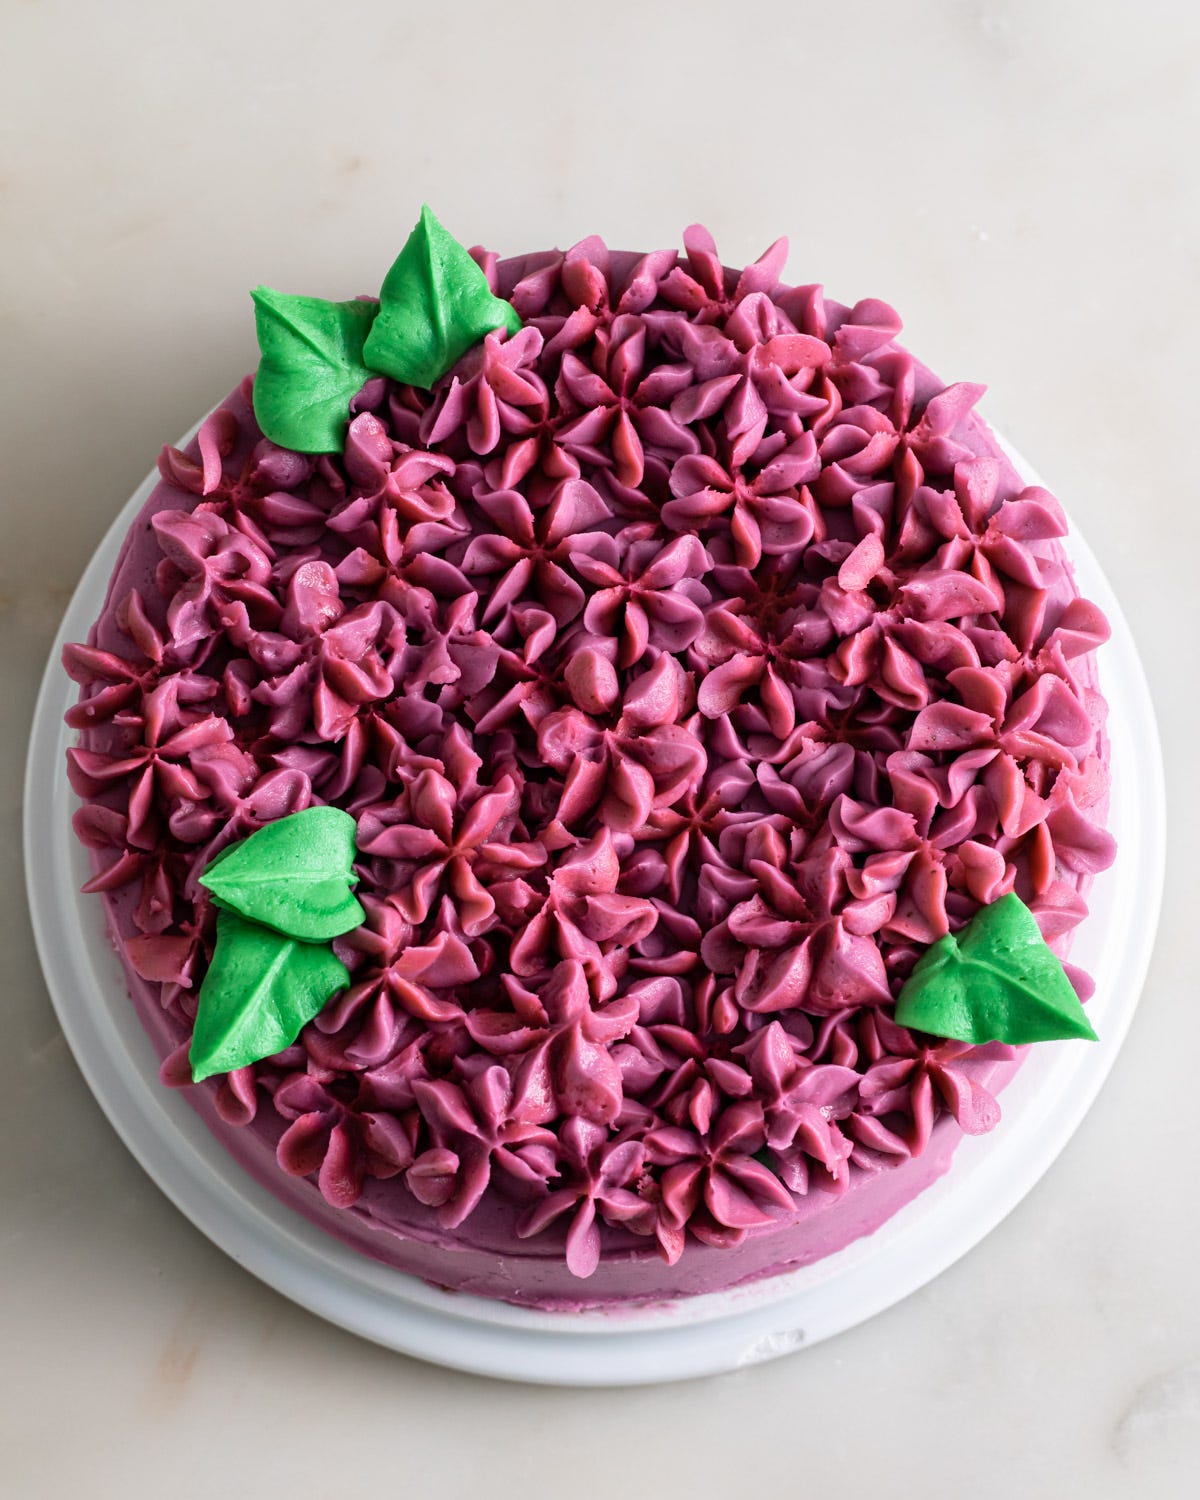
This design is full of texture that is easily achieved by using just one piping tip. Mixing different shades of buttercream in the piping bag gives it mega depth and detail.
Tools:
Star Tip (Wilton #2D)
Leaf Tip (Wilton #366)
2 Piping Bags
Gel Food Coloring
Instructions:
Mix two or three shades of purple buttercream.
Fit the piping bag with the star tip. Begin randomly adding the different colors of buttercream to fill the bag, swiping one of the colors up one side or layering the colors and mixing them within the bag.
Hold the piping bag straight down, hovering about a half-inch above the surface of the cake. With even pressure, give the piping bag a squeeze until a flower forms. Stop squeezing the bag before pulling straight up and starting again.
Cover the top of the cake with flowers. Add a second layer of flowers to fill in the gaps.
For the leaves, mix together a green buttercream. Fill a piping bag fitted with the leaf tip with the green buttercream.
Hold the piping bag at a 45° angle with the pointed part of the piping tip facing up (you should not be able to see the cut out “v” shape).
Gently squeeze the bag until the buttercream begins to build, then taper off the pressure on the piping bag. As you pull away, the tip will form.
Tip: If you don’t have a leaf tip, try cutting a small “v” in the tip of a piping bag.
Need more? Check out these buttercream techniques in action over on Instagram.
Pink Petal Cake
For this design, the petals are formed by hand. The key is to always angle the spatula towards the center of the cake, so make sure to either turn the cake or your body as you go around.
Keep reading with a 7-day free trial
Subscribe to Tessa Huff's Bake Club to keep reading this post and get 7 days of free access to the full post archives.


