Style Sweet Bake Club

Share this post

How to Ice a Perfect Ombré Cake

bakeclub.stylesweet.com

How to Ice a Perfect Ombré Cake

8 years later, I finally updated this popular cake tutorial!

Tessa Huff
Jun 10, 2022
8
1
Share this post

How to Ice a Perfect Ombré Cake

bakeclub.stylesweet.com

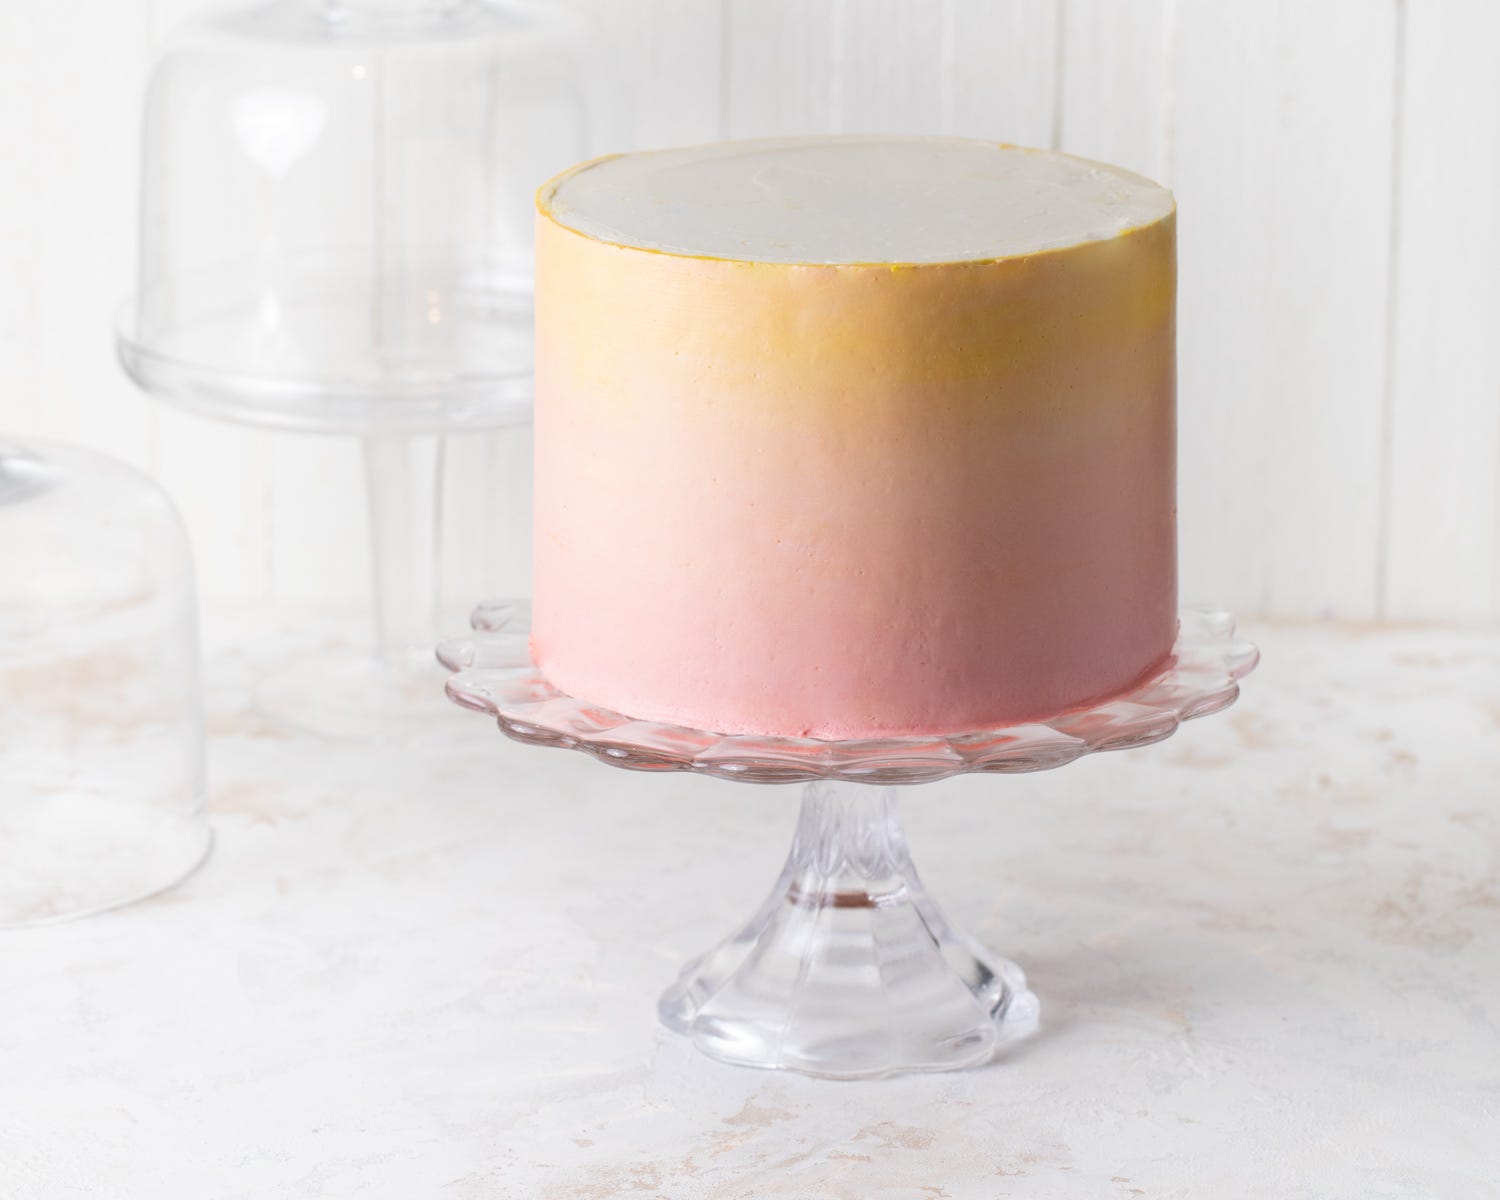
The dreamy blend of buttercream on an ombré cake outlasted its trending years and will be a forever classic cake design, in my opinion at least. I first created this cake tutorial back in 2014 when ombré was having a huge moment - from hair to textiles.

8 years later, I’m still swooning over the ombré effect on a buttercream cake. In fact, I love it so much that it made the cover of my book, Icing on the Cake.

After many, many years, please allow me to reintroduce this cake decorating technique with all new photos and a few more helpful hints.

Tools:

  • Rotating cake stand

  • Offset spatula

  • Gel food coloring

  • Icing smoother

  • Paring knife

  • Round piping tip and bag

Get links to all my favorite cake decorating tools here!

Style Sweet Bake Club
My Top Cake Decorating Tools
Overwhelmed by the cake decorating aisle? Wondering if you need dozens of piping tips, various spatulas, or specialty brushes? I’m going to let you in on a secret… In my 15+ years of cake decorating, most cakes coming out of my kitchen are made with the same 5 tools…
Read more
a year ago · 2 likes · 1 comment · Tessa Huff

How to Ice a Perfect Ombré Cake

1. Prepare the Cake

Before you get started, fill and stack your cake layers. Give the cake a good crumb coat, a thin layer of icing that traps in all of the crumbs, and chill it in the refrigerator for 15 minutes.

Style Sweet Bake Club
Bake Club+ : How to Stack and Fill a Cake Like a Pro
I am so excited that you’ve decided to level up your cake skills - I’m talking two, three, four layers high! Take the first step of improving your layer cakes by learning how to fill and stack a cake. Gorgeous cakes start from the inside out, and the bottom up. Have you ever seen a multi-tiered wedding cake or a dangerously, sky-high layer cake and wond…
Read more
2 years ago · 2 likes · Tessa Huff

2. Pick Your Colors

Select your color palette (3 to 4 colors) and decide which color you want for the top of the cake. For me, I used white. Place a large dollop of buttercream on top of the cake.

3. Frost the Top

Using a small offset spatula, smooth out the buttercream on top of the cake (as you would ice a regular cake). Don't be afraid if some of the frosting hangs over the edge of the cake - it will help with the ombré blend later.

4. Tint the Buttercream

Reserve a small amount of the buttercream color used for the top of the cake, then divide the remaining buttercream into 3 bowls. Tint each bowl the colors of your choice.

5. Start Piping

Place your first color in a piping bag fitted with a plain round tip. Starting at the bottom, pipe a ring or two of icing around the cake.

Empty the buttercream back into the bowl and mix in some of the next color. I started with pink, then added in some of the orange to create a pink-orange buttercream. Add the new pink-orange buttercream back into the piping (using the same bag is fine).

6. Mix and Repeat

Pipe another ring around the cake and repeat with the remaining buttercream, mixing the colors as you go.

Complete the sides of the cake by piping on the last color (yellow, in my case). You may mix this with the reserved buttercream color from the top of the cake, if you’d like.

7. Smooth and Spread

Once all of the colors are on, begin smoothing out the buttercream. Start by using an offset spatula held perpendicular to your turntable. Remove any excess frosting, but do not worry about getting things perfect just yet. Be sure to clean off your tools between use.

8. Blend the Colors

To blend even further, use the tip of your spatula to create horizontal zig-zags around the sides. If not, it may appear striped, which is also quite pretty.

9. Smooth and Smear

Next, take your icing smoother and continue to even out the buttercream. Place the smoother lightly on the cake, with the bottom touching the turntable, and rotate the cake around. Remember to smooth, not scrape off, the buttercream and clean your tools between rotations.

Touch up any gaps with leftover buttercream.

10. Trim the Top

For a super clean and crisp top edge, trim off the excess buttercream with a paring knife. This technique works best if the buttercream is firm (chill for about 10 minutes, or as needed).

Why trim the top? This technique prevents the colored buttercream from smudging onto the top of the cake.

Baker’s Notes:

  • Be mindful of your color choices and think about how they might blend together. Using colors that are in order on the color wheel will ensure that the blended colors don’t turn muddy. Think pink/orange/yellow or blue/purple/pink.

  • I’ve successfully made this cake design with both meringue-based and American-style buttercreams. 

1
Share this post

How to Ice a Perfect Ombré Cake

bakeclub.stylesweet.com
1 Comment
founding
Diz814
Jun 10, 2022Liked by Tessa Huff

It’s such a beautiful technique.

Expand full comment
Reply
TopNewCommunity

No posts

Ready for more?

© 2023 Style Sweet Bake Club
Privacy ∙ Terms ∙ Collection notice
Start WritingGet the app
Substack is the home for great writing