The Home Baker's Guide : Essential Equipment
SEPTEMBER SALE! Back to school means more time back in the kitchen. Get your gear in order for fall baking!
Hi Bakers! It’s finally back to school time in the Huff house. After a busy summer of moving and playing with the kids, I am looking forward to settling back into a routine and spending more time in the kitchen.
This month, we will be getting our kitchens stocked and ready for fall baking. Moving was a great chance for me to reset and really evaluate the tools and baking equipment that I really need.
If you are a free subscriber and you enjoy tasty baking recipes, then please also enjoy this Bake Club+ September Sale! The holidays are coming up fast, and I know you are going to love all the festive treats we will be baking up over the next few months.
Snag your discount now as we prep for baking’s biggest season!
Thank you always to those who have supported the Style Sweet Bake Club and anyone who has ever read, shared, and/or baked a recipe from our club.
I recently moved from a small city apartment to a house in the suburbs. 8 years prior to that, I owned a bakery in California. Before moving to Canada, I had to scale down my commercial-sized equipment, multiple sets of baking pans, and boxes of piping tips, measuring cups, and single-use items to fit in our moving van and into said apartment. I really had to prioritize the tools for everyday baking at home and very rarely do I miss the random extra large muffin tin or third rolling pin.
Now that I actually have the space and a proper pantry, I still only use the same key pieces of equipment. As it turns out, you don’t need all the fancy tools and specialty cake pans to produce amazing bakes (I wrote two cookbooks with very limited space and tools). Instead, I keep my list of essentials short but sturdy. Here are my must-have baking tools for the home baker:
The Home Baker’s Guide : Essential Equipment
Cake Pans
For round cakes, I have both Fat Daddio’s and Wilton brand pans. These have lasted me through the bakery years and multiple cookbook testings. While they both work great and stand the test of time, the Fat Daddio’s are superior - but just slightly. When purchasing cake pans, choose ones made from aluminum (not nonstick) with sides that are at least 2-inches tall. Depending on how often you make cakes and how many servings you are after, I recommend a set of three, 6-inch cake pans and/or three 8-inch cake pans.
Rotating Cake Stand
If you enjoy decorating cakes, then this will make life so much easier. Again, I have had my heavy-duty Ateco cake stand since the bakery days and it is still something I rely on weekly. However, when I teach in-person classes, my students use plastic Wilton cake stands (I can’t even imagine trying to haul a class set of the metal ones around - so heavy!). On class day, I teach with the same Wilton one that my students use and it works out just fine.
Baking Pans
For sheet cakes and rimmed baking sheets, I like Nordicware. I also have a set from Williams-Sonoma that are great too. The Williams-Sonoma Goldtouch line is pretty luxurious, but their basic line works just as well lined with parchment paper.
If you are looking to stock your kitchen, I recommend starting with a 9 x 13-inch pan with sides that are at least 2-inches tall, a rimmed half-sheet pan, a 9 x 5-inch loaf pan, and either an 8 x 8-inch or 9 x 9-inch square pan.
Bundt Pan
Nothing really beats a classic Nordicware Bundt pan. I’ve tried other (cheaper) brands only to end in disappointment. Nordicware offers so many beautiful designs, but I definitely recommend something less intricate. The more details in the pan, the less evenly the cake bakes and the higher chances of it getting stuck in the pan.
Offset Spatula
This is probably my favorite tool of all. I have a mini and a large, and they are so useful and versatile. The metal strip that is bent at the handle gives you tremendous control when spreading fillings, icing cakes, and evening out batter without your fingers in the way.
Disher/Mechanical Ice Cream Scoop
A disher keeps things uniform and tidy. I find myself reaching for one beyond just scooping cookies and ice cream, like for portioning cake filling and making perfectly measured cupcake batter. They come in all sizes, but a medium, 2 ¾-inch diameter scooper (#40) is the most versatile. OXO has a great scooper, but you can find an assortment at most restaurant supply stores.
Icing Smoother
If you ever took a class from me or watched me ice a cake, then you know this $5 cake comb/smother is my secret to smooth buttercream. I love the weight - heavier than a plastic one and lighter than a regular bench scraper.
Parchment Paper
I’ve collected a ton of silicone baking mats over the years, but I most often reach for plain parchment paper. It is cheap and can be reused (aside from really messy situations). Pay attention to your recipe - sometimes a cookie recipe will call specifically for parchment over silicone to ensure crispy bottoms.
Stand Mixer
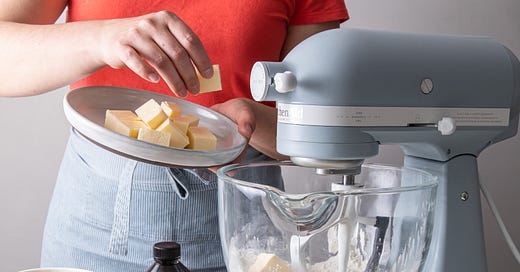
My KitchenAid has been the ultimate workhorse in every kitchen I have ever worked in. They are a bit of an investment, but I am still using the same mixer from the bakery days. It is about 12 years old and helped make multiple wedding cakes per week, ran almost 24/7 while developing two cookbooks, was stopped and started by rough toddler hands, and still runs strong.
Do you absolutely need a stand mixer? Probably not. Many cake and cookie recipes can be made with a hand mixer (or in a mixing bowl) and bread can be kneaded by hand. Is having one super helpful? You bet! For tasks like making meringue, using the foaming method, and other things that require two hands, then having a stand mixer is very convenient.
Kitchen Scale
You’ve heard it time and time again - using a kitchen scale is the most accurate way to measure ingredients. But I’d be lying if I said I didn’t use a dry measuring cup myself from time to time. Even if you don’t want to weigh ingredients every time, an inexpensive kitchen scale can be used for splitting batters, scaling down recipes, and more.
Oven Thermometer
Wondering why your bakes aren’t turning out - even after all of your trouble-shooting? It could be your oven. You can pick up an inexpensive internal oven thermometer at most grocery stores. An oven thermometer will let you know the actual temperature inside of your oven - despite what the dial says on the outside. Remember to wait until the oven completely pre-heats before baking!
Heat-Safe Spatula
You will likely always need a rubber spatula in your life. I highly recommend a heat-safe rubber spatula that doubles for mixing on the counter and on the stove. In the pastry kitchen, you’ll use it for making lemon curd, pastry creams, and melting chocolate. I love GIR - not only do they come in beautiful colors, they are made with premium BPA-free silicone and are super durable (this coming from someone that has broken at least a half dozen wooden-handled spatulas over the years).
Pie Pan
Don’t be swayed by all the pretty ceramic pie pans. Your best bet at preventing soggy bottoms is a basic aluminum pan or glass pan (where you can see if the bottom is done baking). These both conduct heat more evenly. Look for a pan with a lip around the edge to help keep your crimp from sliding down the sides.
Basics:
Measuring spoons, dry and wet measuring cups, mixing bowls, rolling pin, whisk, saucepan, wooden spoon, serrated knife, paring knife, cupcake/muffin pan.
Extras and Nice-to-Haves:
Silicone baking mats, pie weights, piping tips, pastry brush, spring-form pan, candy thermometer, microplane, food processor, tart pan, fine-mesh sieve, cookie cutters.
This article is perfect! Although I get mesmerized by all the pretty baking tools and serving pieces, paring down is a must! It makes it so much easier to just grab and go with the basic tools. Thanks for the tips and tools of the trade.